AI Chat
The AI Chat is a conversational AI that can aid content creation and editing. It introduces a dynamic chat interface designed to facilitate rich, multi-turn interactions between users and AI, enabling an interactive and collaborative experience within writing workflows.
CKEditor AI operates directly within the context of your document. When you chat with it, you can ask questions about specific sections, request a full-document proofreading, and more.
By enabling Web search or Reasoning, you can extend its capabilities — allowing the chat to look up information online and tackle complex tasks step by step.
Not only can you chat with the AI, but you can also use it to introduce changes to your document. Ask it to “Summarize the document”, “Turn this report into a one-page executive summary”, or “Suggest better section titles and subheadings”. The AI will then propose a series of changes to the document you can review and accept or discard one by one. Copying and pasting chat transcripts is over; CKEditor AI understands your content and edits with you hand in hand.
The chat feature jump-starts your creative process. Begin with a blank document and ask the AI for ideas. Build your content step by step by chatting and applying changes. Then review – or have the AI rewrite – the final draft for best results. All in one place.
To start using the Chat feature, load the AIChat plugin in your editor configuration. The Chat button ![]() will appear in the AI user interface along with the Chat history
will appear in the AI user interface along with the Chat history ![]() . Learn more about installing and enabling AI features.
. Learn more about installing and enabling AI features.
In multi-root and multi-editor (Context) setups, AI Chat sees content from every root across every editor, and the conversation history is scoped per Context. See the AI in multi-root and multi-editor setups guide for the integration details.
Users can select the desired AI model for their conversation from a dropdown at the bottom of the chat.
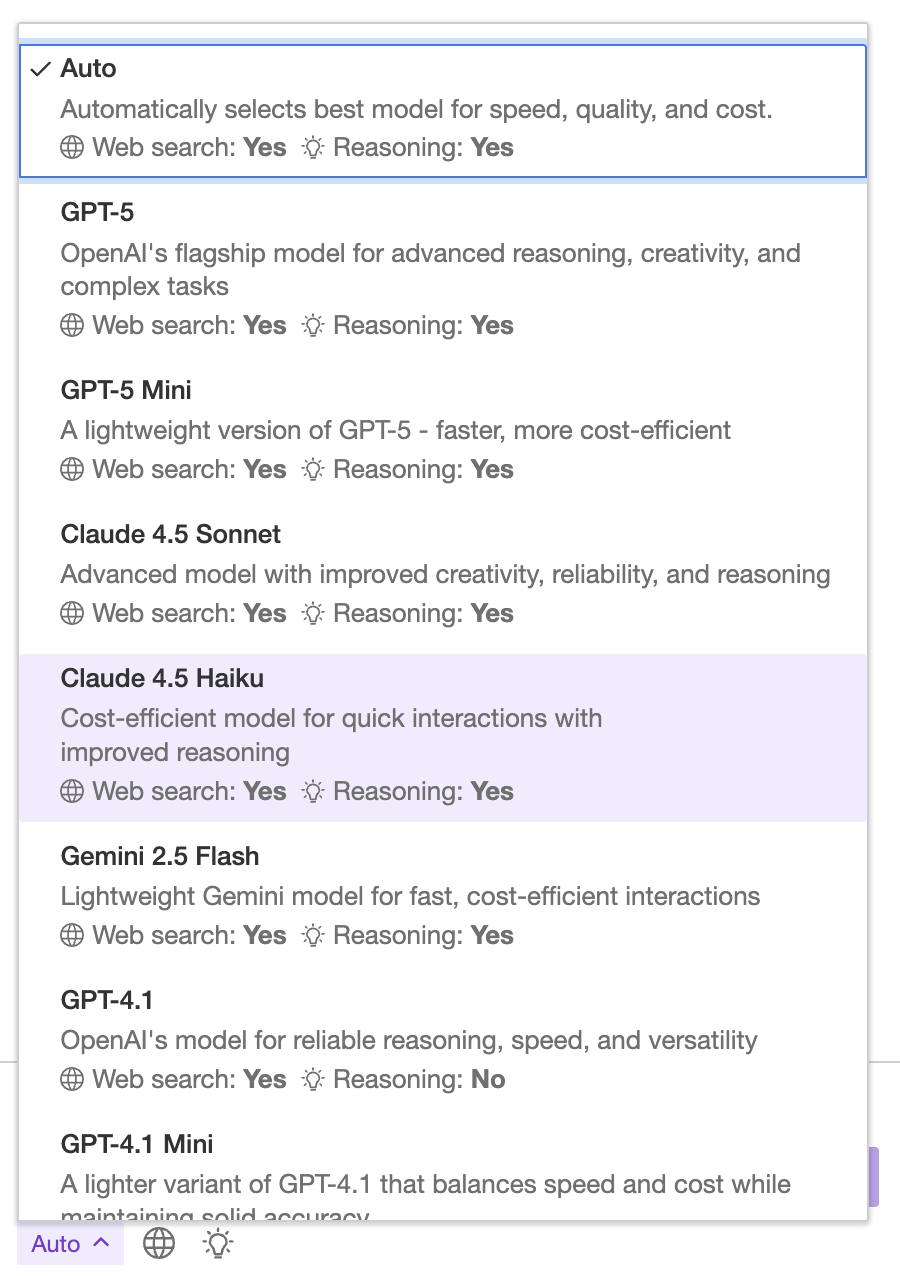
Screenshot is illustrative; see supported AI models for the current list.
Once selected, the AI model will persist for the duration of the conversation. If you want to change the model, you can start a new conversation using a dedicated + New chat button at the top-right corner of the chat panel.
Web search in Chat allows it to access and retrieve real-time information from the internet. Instead of relying only on pre-trained knowledge, the model can search the web to find up-to-date facts, verify details, and provide more accurate, current answers. Toggle the “Enable web search” button ![]() for a compatible model to start using the Web search functionality.
for a compatible model to start using the Web search functionality.
Reasoning in Chat models turns on the ability to think through problems, draw logical conclusions, and make sense of complex information. It enables the model to analyze context, connect ideas, and produce well-structured, coherent answers beyond simple pattern matching. Toggle the “Enable reasoning” button ![]() for a compatible model to start using Reasoning.
for a compatible model to start using Reasoning.
The optional config.ai.models setting controls the models available to the users across all AI features (Chat and Review Mode). The property lets you set the default model, tailor the available models list, and control the model selector UI visibility. Learn more about available AI models.
ClassicEditor
    .create( {
        /* ... */

        plugins: [ AIChat, AIEditorIntegration, /* ... */ ],

        ai: {
            models: {
                defaultModelId: 'claude-4-5-haiku',
                displayedModels: [ 'gpt', 'claude' ],
                showModelSelector: false
            }
        }
    } )
    .then( /* ... */ )
    .catch( /* ... */ );
The AI chat can work with your document and beyond. Use the “Add context” button ![]() on the right of the prompt input, to add URLs, files, and external resources to your conversation.
on the right of the prompt input, to add URLs, files, and external resources to your conversation.
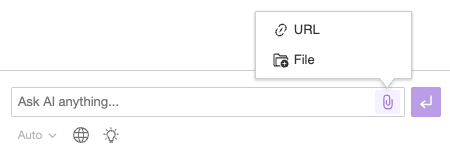
Ask the AI about specific resources, for instance, “Describe the attached image” or “Summarize the key points from the attached Word document”. The AI will analyze those resources for you and provide information you can easily use in your document.
External resources enable you to seamlessly integrate knowledge bases and other centralized data into your AI Chat conversations. Instead of uploading documents each time you want to chat, you can simply select them from a list and reference them during your conversation. Learn more about configuring resources in AI Chat.
The config.ai.chat.context property configures the AI Chat menu for adding resources to the prompt context.
The example below enables built-in options to add the current document, URLs, and files to the conversation context by the user.
It also demonstrates a context sources configuration that introduces a menu with external resources fetched from a database or an external API for the user to pick from. You can learn more about the configuration of a custom context providers in the documentation.
See the example configuration below:
ClassicEditor
    .create( {
        /* ... */

        plugins: [ AIChat, AIEditorIntegration, /* ... */ ],

        ai: {
            chat: {
                context: {
                    // Allow for adding the current document to the conversation.
                    document: {
                        enabled: true
                    },

                    // Allow for adding URLs to the conversation.
                    urls: {
                        enabled: true
                    },

                    // Allow for uploading files to the conversation.
                    files: {
                        enabled: true
                    },

                    // External resources configuration.
                    sources: [
                        // Definition of the custom context provider.
                        {
                            // The unique identifier of the provider.
                            id: 'my-docs',

                            // The human-readable name of the provider.
                            label: 'My Documents',

                            // The async callback to retrieve the list of available resources.
                            // Usually involves fetching data from a database or an external API,
                            // but here we use a simple array of resources for demonstration purposes.
                            getResources: async ( query ) => [
                                // Text resources.
                                {
                                    id: 'text3',
                                    type: 'text',
                                    label: 'Internal note in HTML format',
                                    data: {
                                        content: '<h2>HTML note</h2><p>Lorem ipsum dolor sit amet...</p>',
                                        type: 'html'
                                    }
                                },
                                {
                                    id: 'text4',
                                    type: 'text',
                                    label: 'Internal note (fetched on demand)',

                                    // Note: Since the `data` property is not provided, the content will be retrieved using the `getData()` callback (see below).
                                    // This will prevent fetching large content along with the list of resources.
                                },

                                // URLs to resources.
                                {
                                    id: 'url2',
                                    type: 'web-resource',
                                    label: 'Company brochure in PDF',
                                    data: 'https://example.com/brochure.pdf'
                                },
                                {
                                    id: 'url3',
                                    type: 'web-resource',
                                    label: 'Company website in HTML',
                                    data: 'https://example.com/index.html'
                                },

                                // ...
                            ],

                            // The optional callback to retrieve the content of resources without the `data` property provided by the `getResources()` callback.
                            // When the user picks a specific resource,  the content will be fetched on demand (from database or external API) by this callback.
                            // This prevents fetching large resources along with the list of resources.
                            getData: ( id ) => fetchDocumentContent( id )
                        },

                        // More context providers...
                    ]
                },
            }
        }
    } )
    .then( /* ... */ )
    .catch( /* ... */ );
By default, the editor selection is added to the AI Chat context only when the user explicitly clicks the “Ask AI” button. You can change this behavior by enabling the config.ai.chat.context.alwaysAddSelection option. When set to true, the current editor selection is automatically added to the conversation context whenever the user changes their selection. If the selection becomes collapsed (empty), it is automatically removed from the context.
This option requires the document context to be enabled (which is the default).
ClassicEditor
    .create( {
        attachTo: document.querySelector( '#editor' ),

        /* ... */

        plugins: [ AIChat, AIEditorIntegration, /* ... */ ],

        ai: {
            chat: {
                context: {
                    alwaysAddSelection: true
                }
            }
        }
    } )
    .then( /* ... */ )
    .catch( /* ... */ );
It’s also possible to allow for adding the context using a custom external UI, for example, a file manager.
First, using the config.ai.chat.context.customItems configuration option, add a button to the “Add context” dropdown that upon pressing will execute the configured callback (for example, open custom content manager). Then you can use the AIChatContext class API to attach the resource chosen by the user to the conversation context. There are various API methods to use depending on the context type. See an example code below.
ClassicEditor
    .create( {
        /* ... */

        plugins: [ AIChat, AIEditorIntegration, /* ... */ ],

        ai: {
            chat: {
                context: {
                    // Other configuration options...
                    customItems: [
                        {
                            id: 'open-file-manager', // Unique item ID.
                            label: 'Open file manager', // Button label displayed in the dropdown.
                            icon: IconImage, // Icon displayed next to the label.
                            callback: ( editor: Editor ) => {
                                // `openFileManager()` is provided by you. It opens a custom UI, and returns a promise.
                                // After the user finishes choosing files, the `openFileManager()` promise resolves with data of these files.
                                openFileManager().then( chosenFiles => {
                                    editor.plugins.get( 'AIChatController' ).activeConversation.chatContext.addFilesToContext( chosenFiles );
                                } );
                            }
                        },
                        {
                            id: 'open-url-manager', // Unique item ID.
                            label: 'Open URL manager', // Button label displayed in the dropdown.
                            icon: IconURL, // Icon displayed next to the label.
                            callback: ( editor: Editor ) => {
                                // `openURLManager()` is provided by you. It opens a custom UI, and returns a promise.
                                // After the user finishes choosing a URL, the `openURLManager()` promise resolves with proper data.
                                openURLManager().then( chosenURL => {
                                    editor.plugins.get( 'AIChatController' ).activeConversation.chatContext.addURLToContext( chosenURL );
                                } );
                            }
                        }
                    ]
                },
            }
        }
    } )
    .then( /* ... */ )
    .catch( /* ... */ );
The AI Chat feature allows you to customize the welcome message displayed to users when the chat initializes. You can set the config.ai.chat.welcomeMessage option in your editor configuration to provide a custom message. If this option is not set, a default welcome message will be shown.
ClassicEditor.create( {
    /* ... */

    plugins: [ AIChat, AIEditorIntegration, /* ... */ ],

    ai: {
        chat: {
            welcomeMessage: 'Hello! How can I assist you today?'

            // More configuration options...
        }
    }
} )
.then( /* ... */ )
.catch( /* ... */ );
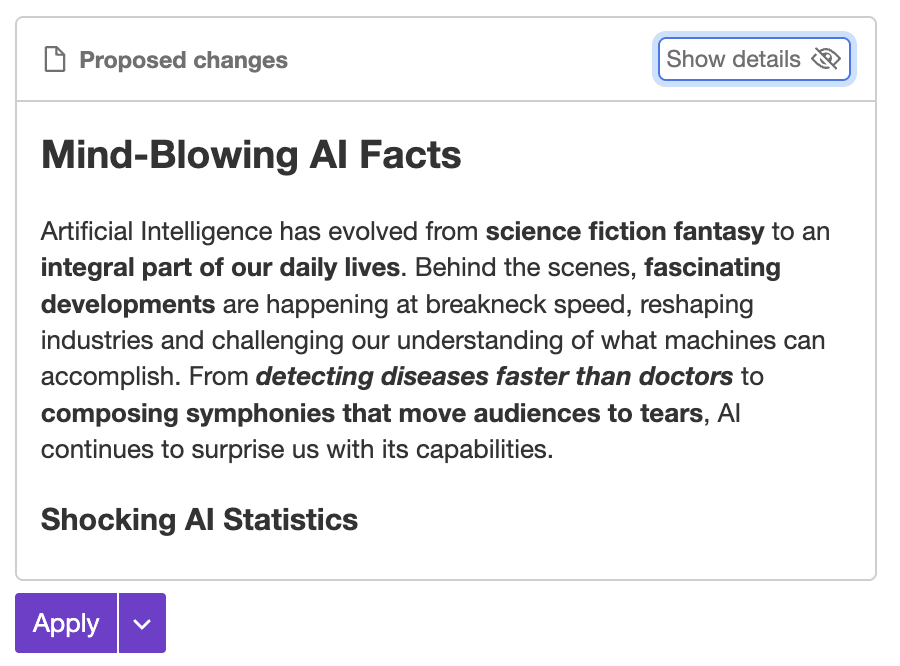
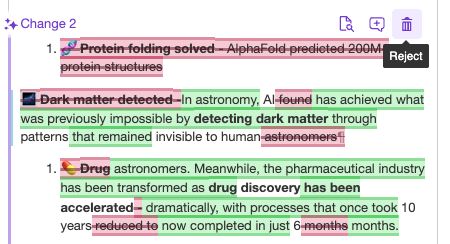
If you ask the AI for changes to your document, for instance, “Bold key facts in the document”, you will receive a series of proposed changes instead of plain text responses:
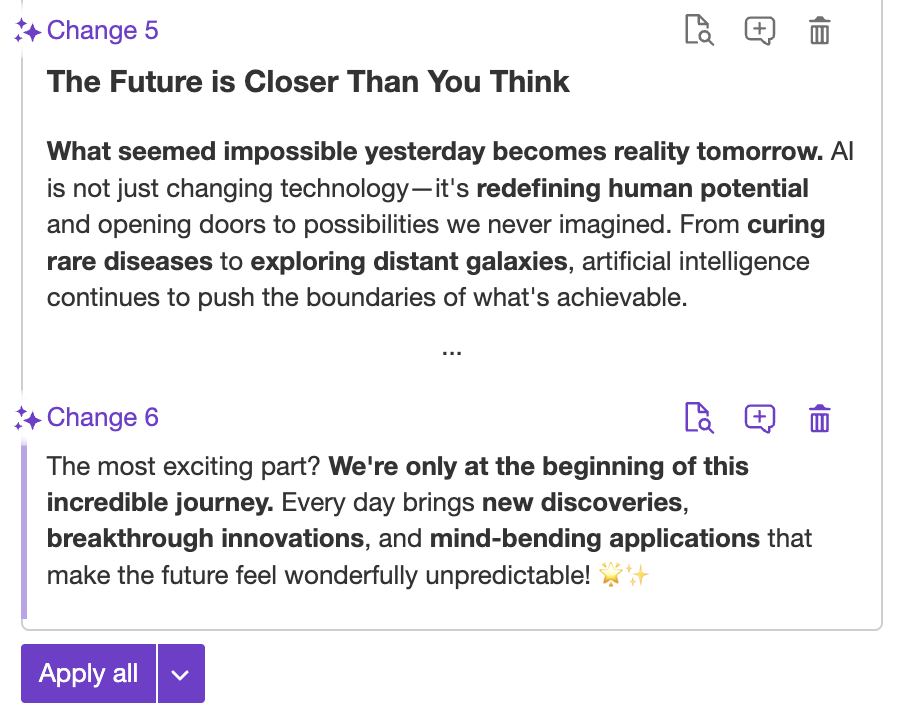
Move your cursor over any change to highlight the section of your document it applies to, helping you identify it among other proposed edits.

You can toggle details of the changes by pressing the “Show details” ![]() button. By default, you will see detailed information on what exactly was suggested, including additions (green markers), removals (red markers), and formatting changes (blue markers).
button. By default, you will see detailed information on what exactly was suggested, including additions (green markers), removals (red markers), and formatting changes (blue markers).
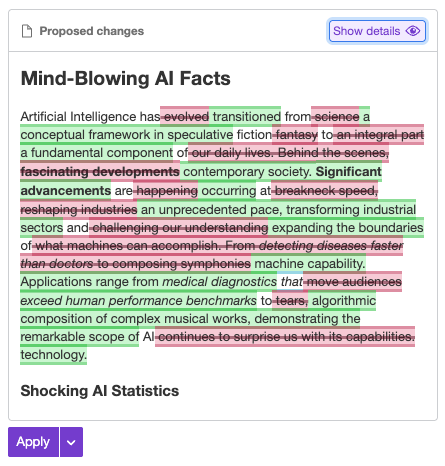
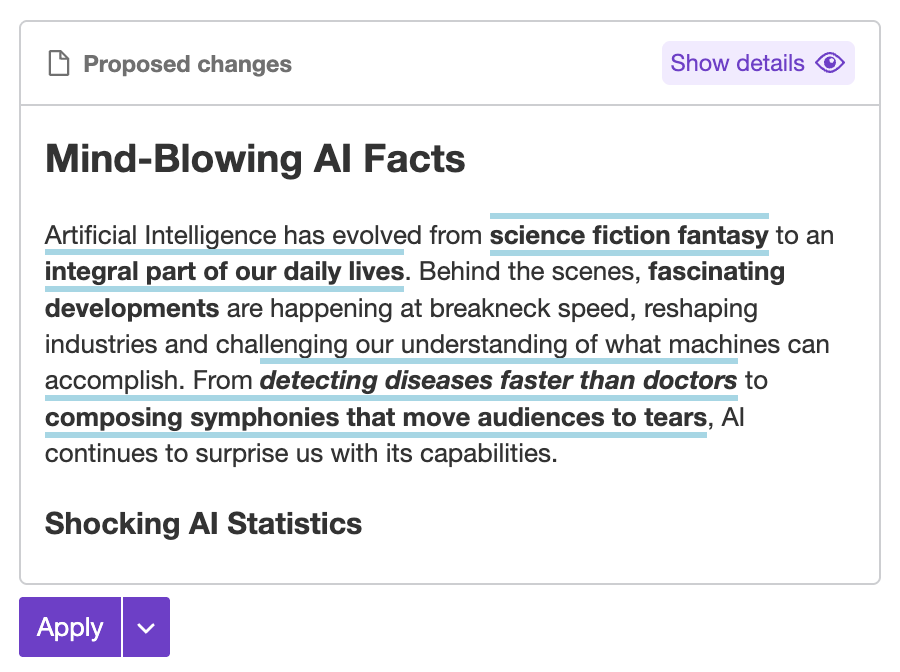
Click the button again to see a clean, simplified overview of the changes as they’ll appear in your document once accepted.
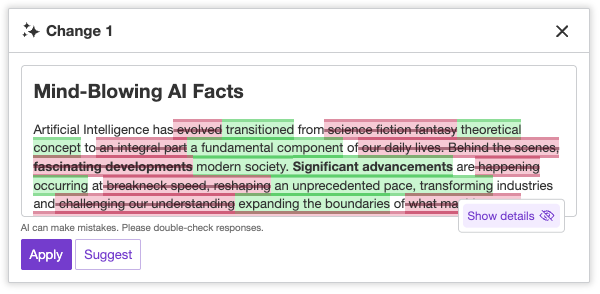
Click on the item in the list to display the information window about an individual change with options to apply it, turn it into a Track Changes suggestion, or reject it. You can use this window to browse all proposed changes and work with them one by one. As you navigate through the changes, the window will automatically follow the corresponding sections of the document.
Make sure your integration includes and enables the AIEditorIntegration plugin to use this functionality.
Each suggestion on the list comes with an “Apply” button ![]() that allows you to apply the change to the document immediately.
that allows you to apply the change to the document immediately.
Click the “Apply all” button in chat to apply all AI suggestions at once.
When Track Changes feature is available in your integration, the “Add as suggestion” button ![]() will be available in chat. Clicking it will create a Track Changes suggestion that can later be reviewed or discarded.
will be available in chat. Clicking it will create a Track Changes suggestion that can later be reviewed or discarded.
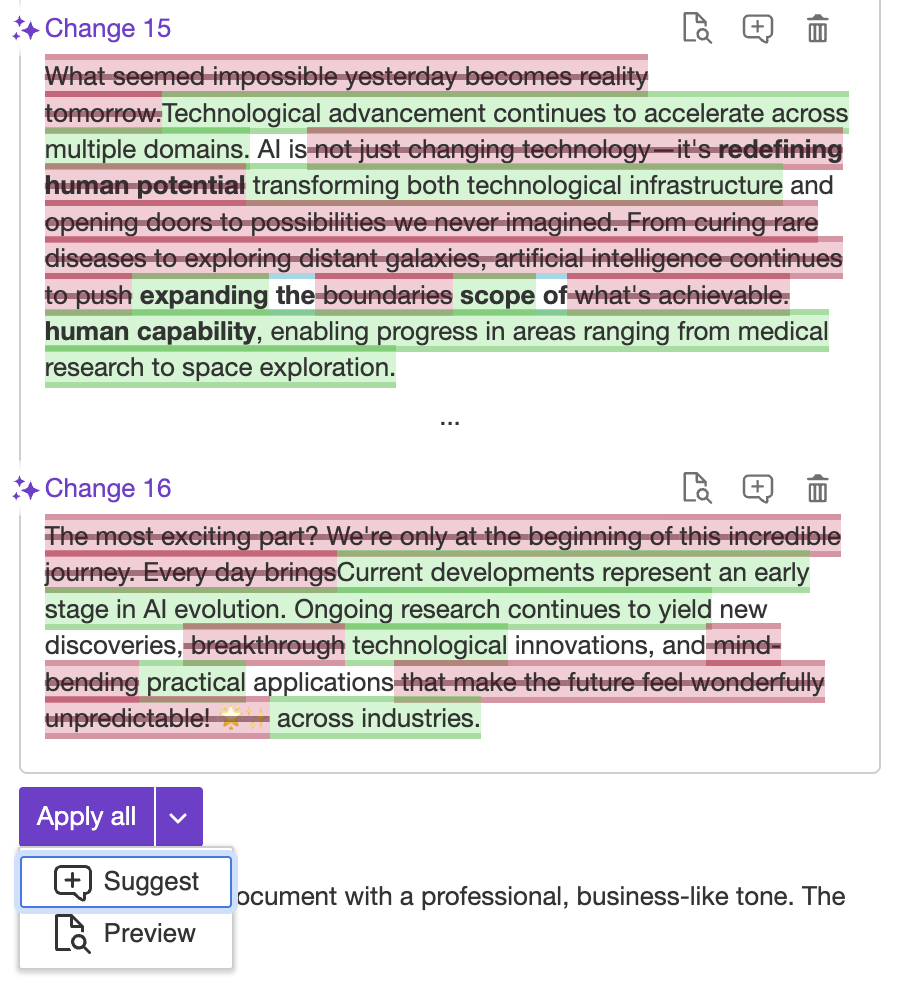
You can pick the “Suggest all” option under the list to turn all changes suggested by AI into Track Changes suggestions.
You can click the “Reject change” button ![]() to reject AI suggestions you do not want before applying the remaining ones or turning them into Track Changes suggestions.
to reject AI suggestions you do not want before applying the remaining ones or turning them into Track Changes suggestions.
All your past conversations appear in the Chat history ![]() . Click the button to open the list, where you can reopen, rename, or delete any conversation.
. Click the button to open the list, where you can reopen, rename, or delete any conversation.
Conversations are grouped by date to help you navigate your project easily. You can filter conversations by name using the search field at the top of the user interface.
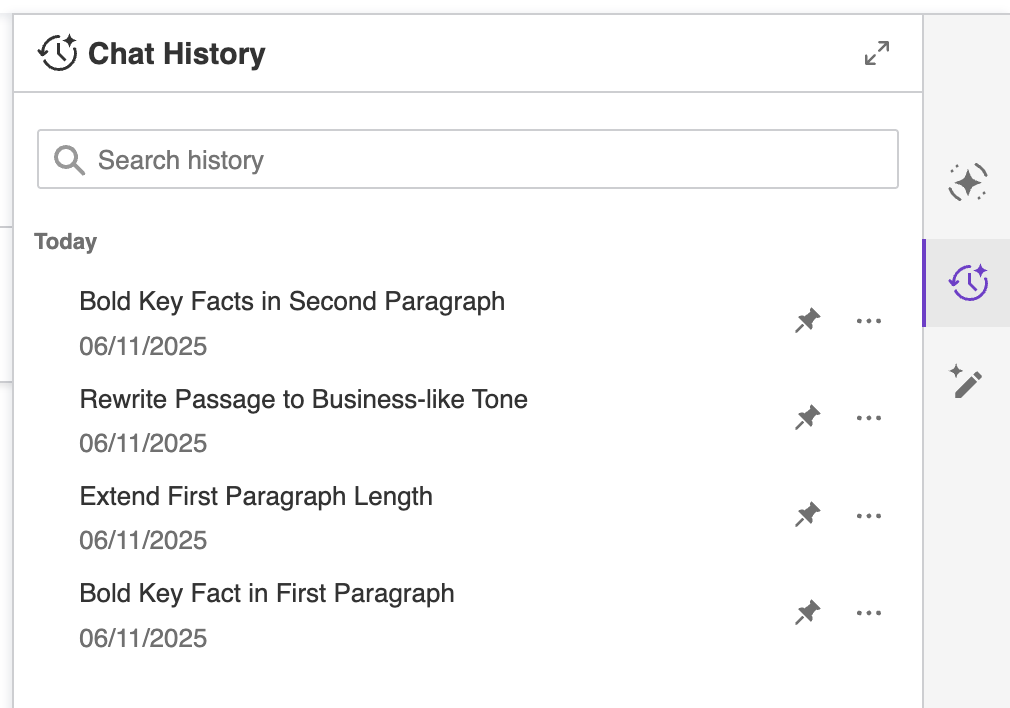
You can continue any conversation from the chat history as long as the AI model used for that conversation is still supported by the feature. Click the conversation in the history to load it in the Chat interface.
The ability to apply suggestions to the document or generate Track Changes suggestions from historical conversations may be restricted in some scenarios:
- In integrations without Real-time collaboration enabled, after closing the browser and reopening the AI Chat, previous conversations will no longer interact with the document content.
- In integrations with Real-time collaboration enabled, past conversations will stay interactive as long as the id of the collaboration#sessions session stays the same.
The AI Chat feature can be enhanced by AI Chat Shortcuts – customizable actions that help users trigger common or useful prompts with a single click. These shortcuts appear at the start of a new conversation, making it faster for users to ask questions, request summaries, check grammar, and more.
AI Chat Shortcuts require loading the AIChatShortcuts plugin in your editor configuration.
You can configure which shortcuts are available using the config.ai.chat.shortcuts option. This allows you to define shortcut labels, icons, prompts, and the type of action to execute. Shortcuts streamline repetitive queries and encourage best practices in your writing workflows.
Example configuration:
import {
    AIChat,
    AIChatShortcuts,
    AIEditorIntegration,

    /* ... */
} from 'ckeditor5-premium-features';

ClassicEditor.create( {
    /* ... */

    // Adding the AIChatShortcuts plugin to enable the feature.
    plugins: [ AIChat, AIChatShortcuts, AIEditorIntegration, /* ... */ ],

    /* ... */

    ai: {
        chat: {
            shortcuts: [
                // This shortcut runs an AI Chat prompt with Reasoning and
                // Web Search features turned on.
                {
                    id: 'continue-writing',
                    type: 'chat',
                    label: 'Continue writing',
                    prompt: 'Continue writing this document. Match the existing tone, vocabulary level, and formatting. ' +
                        'Do not repeat or summarize earlier sections. Ensure logical flow and progression of ideas. ' +
                        'Add approximately 3 paragraphs.',
                    useReasoning: true,
                    useWebSearch: true
                },

                // This shortcut starts proofreading the document by the AI Review feature.
                {
                    id: 'fix-grammar-and-spelling',
                    type: 'review',
                    label: 'Fix grammar and spelling',
                    commandId: 'correctness'
                },

                // This shortcut switches the UI to the Translate feature and allows
                // the user decide what to do next (choose a language).
                {
                    id: 'translate-document',
                    type: 'translate',
                    label: 'Translate document'
                }
            ]
        }
    }
} )
.then( /* ... */ )
.catch( /* ... */ );
Please keep in mind that specific shortcuts may require additional plugins to be loaded in your editor configuration. For example, the “Fix grammar and spelling” shortcut requires the AIReviewMode plugin to be loaded that enables the AI Review feature.
You can also customize the AI Chat welcome message that users see at the beginning of a new conversation by using the config.ai.chat.welcomeMessage option. Use this configuration to highlight specific AI Chat Shortcuts or to explain their purpose.
AI Chat can be controlled programmatically – send messages, start conversations, and manage chat context from code.
Some of our APIs are experimental but ready for production usage. We mark them as experimental to have a possibility to iterate on them faster. That means minor releases without the standard deprecation policy. Breaking changes will always be documented in the changelog with migration guidance.
| API | Description |
|---|---|
AIChatController#sendMessage() |
Programmatically send a message to AI Chat. |
AIChatController#startConversation() |
Start a new chat conversation. |
AIChatController#addSelectionToChatContext() |
Attach the current editor selection as context for the next message. |
See the programmatic usage guide for details, examples, and a live demo.
AI Chat conversations are also available via the Conversations REST API, which supports multi-turn conversation history, file uploads, and web search capabilities. Use this to build chat-based AI features outside the editor. See the programmatic documentation for examples and the full API reference.